Whether you’re a content creator or a business owner looking to share the responsibilities, granting access is a seamless process through YouTube Creator Studio. Follow our step-by-step guide to empower your team and streamline collaboration.
1. Login to YouTube Creator Studio
Begin by logging into your YouTube Creator Studio account. This is your gateway to controlling and customizing your channel.
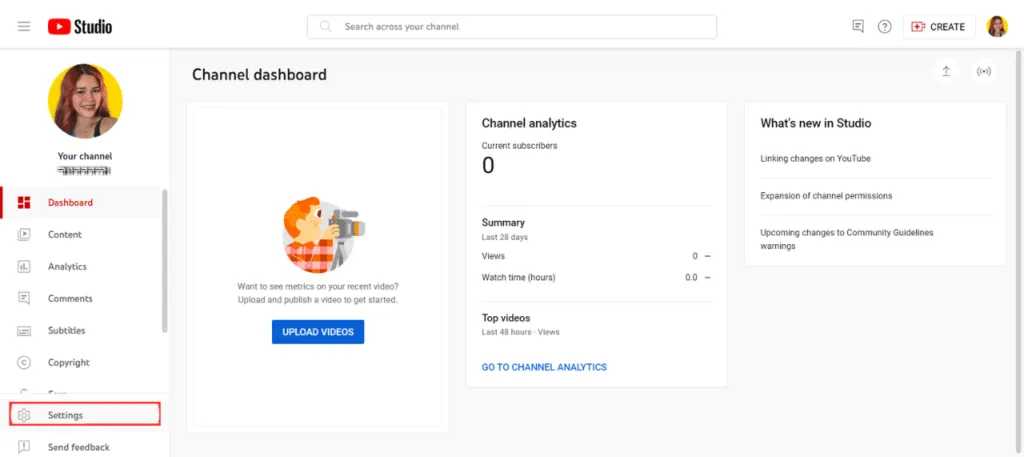
2. Access Settings
Navigate to the bottom right corner and click on “Settings.” This will open up a menu where you can make essential adjustments to your channel.
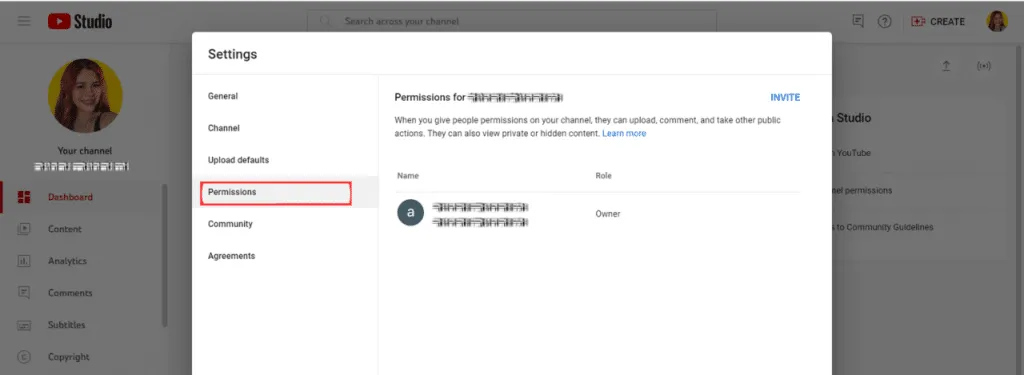
3. Choose Permissions and Manage Permissions
Click on “Permissions,” and from there, select “Manage permissions.” This step is crucial for fine-tuning who has control over your YouTube channel.
4. Utilize Your Google Brand Account
If you manage permissions through your Google brand account, a new window will appear. Click on the enticing blue box labeled “Manage permissions” to proceed.
5. Login to Your Google Account
You’ll be redirected to the Google account login page. Enter your credentials to ensure a secure connection.
6. Add Collaborators
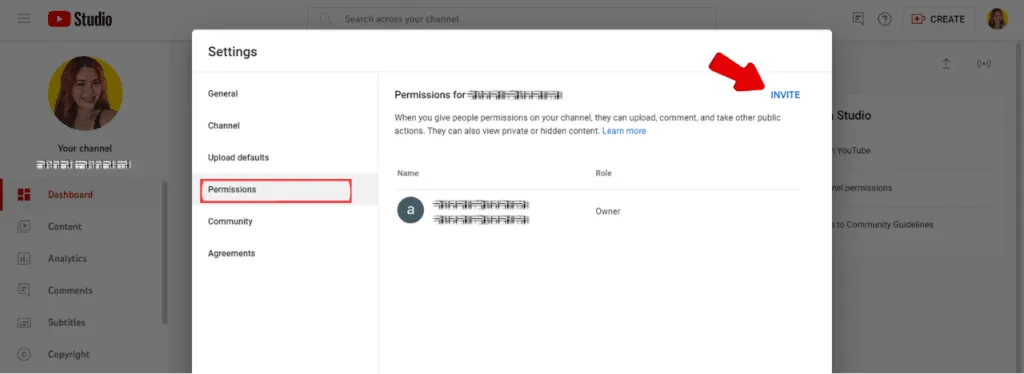
Spot the invite icon with a button in the top right corner. Click on it and a dialog box will appear.
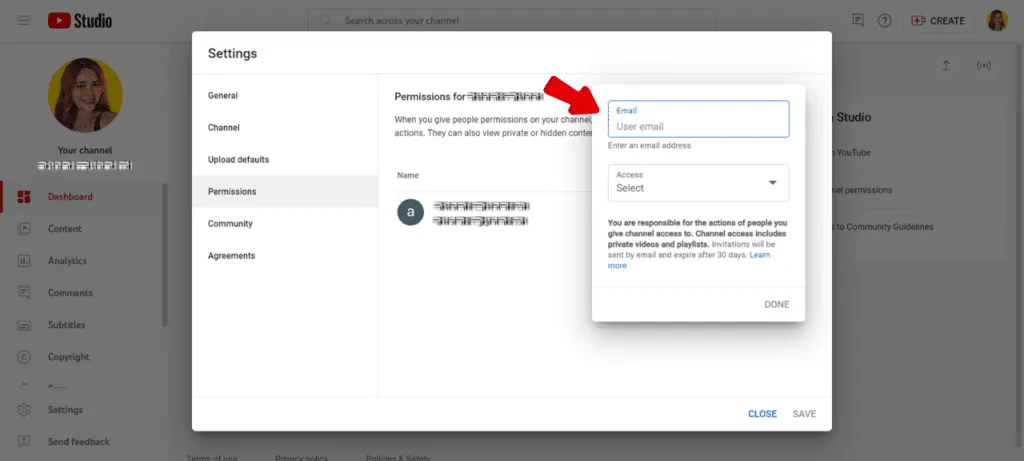
7. Enter Email Address
Type in the email address of the person you wish to invite to manage your YouTube channel. This ensures that the right individuals are granted access.
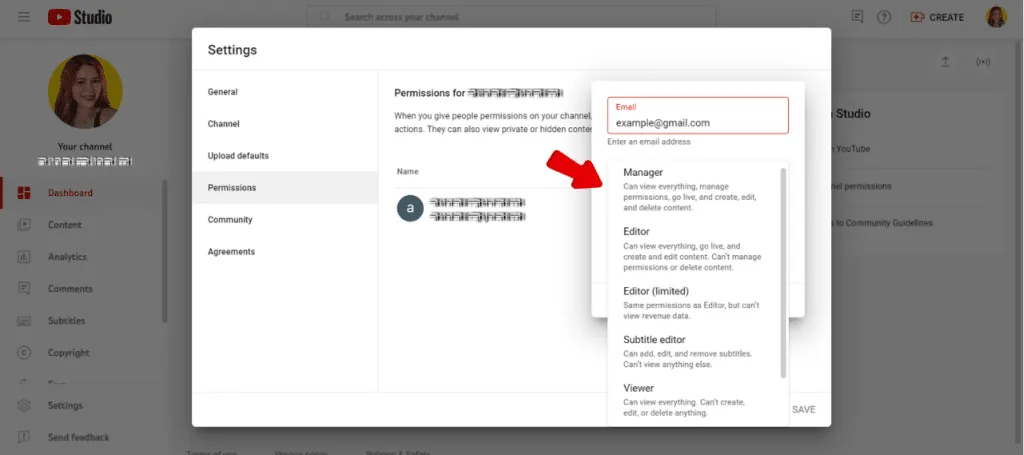
8. Choose Permissions
Decide on the level of access you want to give:
9. Send Invitations
Click on “Invite” to send out the invitations. Your chosen collaborator will receive an email, extending the invitation to become an admin on your YouTube channel.
Moving Admin Permissions Directly to YouTube Creator Studio
1. Skip the Google Brand Account Step
Unlike the conventional method, you can cut out the need for a Google brand account altogether. Instead, move your permission-granting directly to YouTube Creator Studio.
2. Navigate to Permissions in YouTube Creator Studio
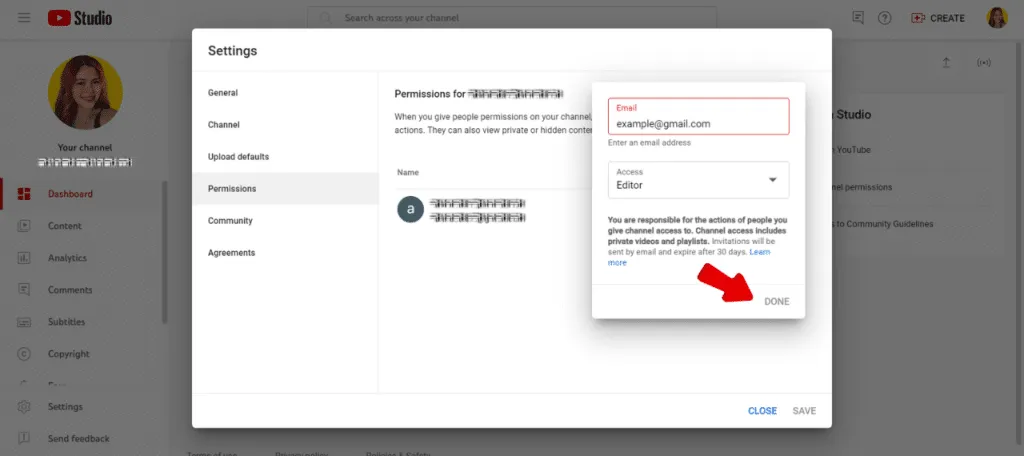
Once you’re logged into YouTube Creator Studio, head to the Permissions section. You’ll notice a handy “Invite” option waiting for you in the top right-hand corner.

3. Inviting Collaborators
Click on “Invite” and follow the familiar process of adding the collaborator’s email address. What sets this method apart is the enhanced range of options when it comes to selecting permissions. Customize access levels directly from YouTube Creator Studio to fit your team’s unique roles and responsibilities.

4. Revoking Access Anytime
The beauty of this direct approach is not just in granting access; it’s also in your ability to revoke it whenever necessary. The process mirrors that of adding someone – simply adjust their permissions or delete them as a user from your channel.
